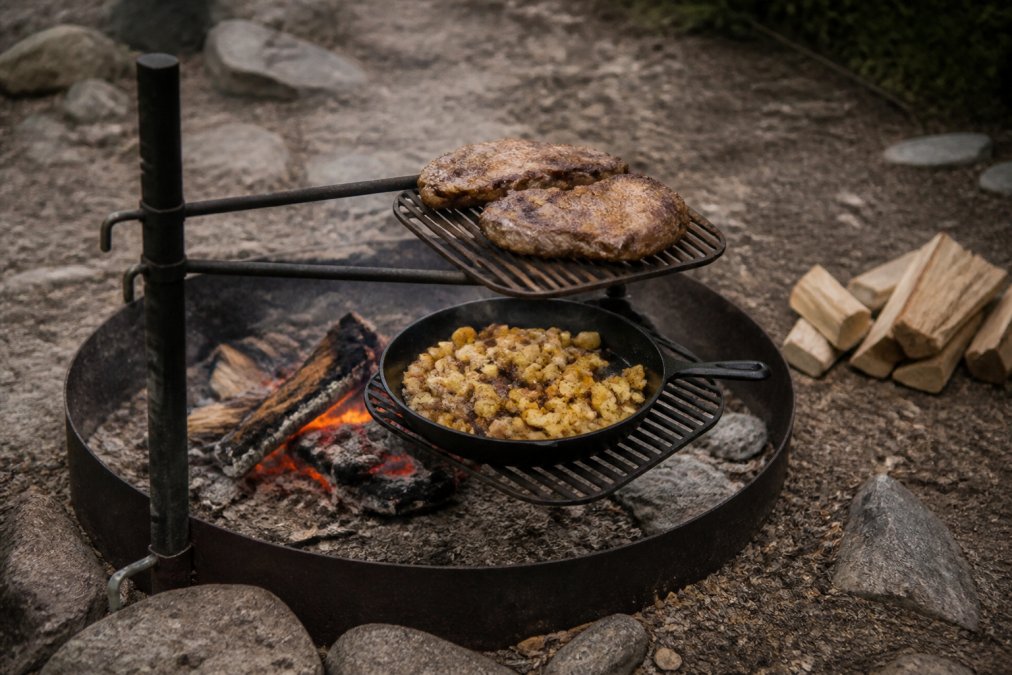
 ultimate-guide
Pro Open Fire Cooking Tips: Heat Zones, Wood, Gear
Table of Contents
- Essential Campfire Cooking Gear for Pro Results
- How to Manage Campfire Heat Zones Like a Pro
- Best Wood for Campfire Cooking and Fire Building
- How to Cook Steak Over an Open Fire: Step-by-Step
- Advanced Heat Zone Management for Open Fire Cooking
- Troubleshooting Common Open Fire Cooking Failures
- Post-Cooking Fire Safety and Cleanup
- Frequently Asked Questions
Last Updated: September 8, 2026
Professional open fire cooking is less about luck and more about controlling three variables: heat, time, and gear. Most camp cooks focus only on the flame and wonder why their steak burns on the outside while staying raw in the middle. The real difference between a backyard cookout and a professional result comes down to managing coals, not flames, and using equipment built for the job. At Browns Outpost, we build heavy-duty cast iron cookware and the ANVIL adjustable campfire grill specifically to help you master these tips for professional open fire cooking, whether you are feeding a family of four or a hunting camp of twelve.

Open fire cooking is the practice of preparing food directly over wood-fired coals or flames, typically using cast iron cookware and adjustable grates. The most important shift you can make is to stop cooking over flames and start cooking over coals, which radiate steady, even heat instead of licking the bottom of your pan with inconsistent temperature spikes.
Essential Campfire Cooking Gear for Pro Results
The right gear determines whether you fight the fire or work with it. Forget flimsy folding grates and thin skillets that warp under heat. Professional open fire cooking demands equipment with thermal mass, meaning heavy cast iron that absorbs heat and releases it evenly across the cooking surface.
Your core kit should include a few non-negotiables. A deep-bellied dutch oven handles stews, braises, and even bread baking under the coals. A flat griddle gives you surface area for pancakes, eggs, and fish that flakes apart on a grate. A cauldron with a reversible lid works for one-pot meals where the lid doubles as a griddle. And an adjustable grill lets you raise or lower your cooking surface to dial in exact heat without moving the food.
The ANVIL grill from Browns Outpost delivers 15 x 20 inches of heavy carbon steel grilling surface and handles 40 lb loads with no problem. Its adjustable height mechanism means you can raise the grate for gentle indirect heat or lower it for a hard sear, all without lifting hot pans. Pair it with a 12" dutch oven at $52.99 for slow-cooked meals, and you have a camp kitchen that rivals your home stove.

Long-handled tongs, leather gloves, and a metal spatula round out the kit. Skip anything with plastic handles, which melt near coals. Look for full-tang metal tools that survive years of abuse.
How to Manage Campfire Heat Zones Like a Pro
Heat zone management is the single skill that separates pros from beginners. A well-built fire produces multiple temperature zones across the coal bed, and knowing where those zones sit lets you cook different foods simultaneously at their ideal temperatures.
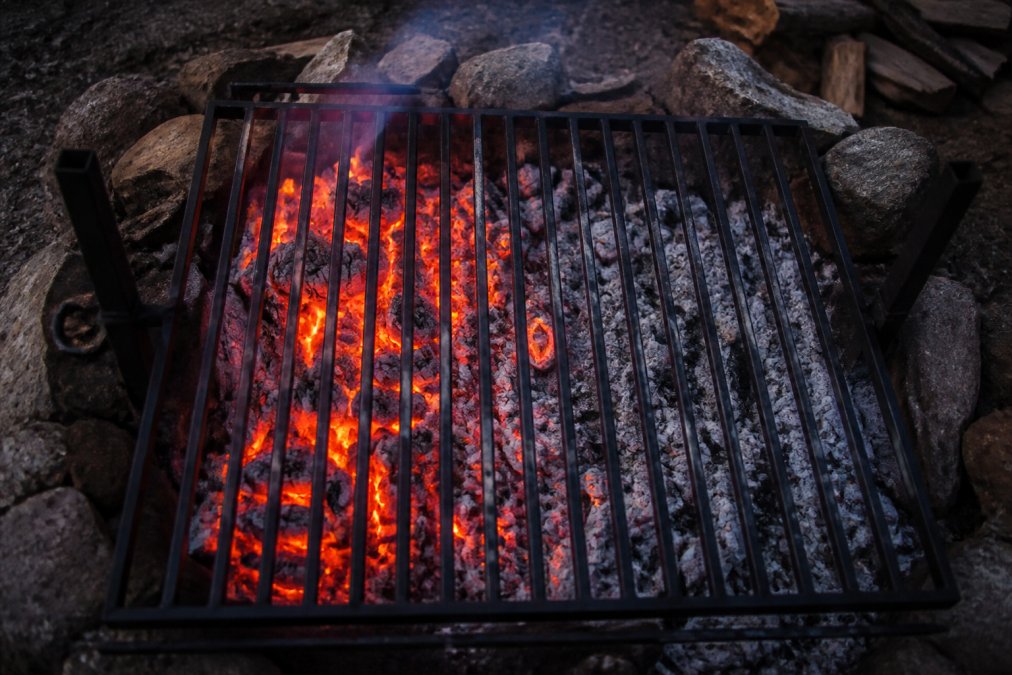
Start by building a fire with hardwood and letting it burn down until you have a solid bed of coals and embers, not active flames. Rake the coals into three distinct zones: a deep pile on one side for searing heat, a medium layer in the middle for normal cooking, and a thin scattering on the far side for warming or slow cooking. This arrangement is the foundation of professional open fire cooking.
The direct heat zone sits directly over the deepest coals. Use it for searing steaks, browning meat, and boiling water fast. The indirect heat zone sits away from the main coal pile, where radiant heat cooks gently without flare-ups. This is where you finish thicker cuts, roast vegetables, or keep food warm while the main course rests.
Managing campfire heat zones requires constant small adjustments rather than big fixes. Move food between zones instead of piling on more wood. If a zone runs too hot, spread the coals thinner. If it runs too cold, rake more coals underneath. You are not fighting the fire; you are directing it.
Best Wood for Campfire Cooking and Fire Building
Wood selection directly controls flavor, heat output, and how long your fire burns cleanly. The best wood for campfire cooking comes from dense hardwoods that produce long-lasting coals with minimal smoke. Softwoods like pine and spruce burn fast, produce excessive smoke, and leave creosote that ruins food.
Hardwood varieties such as oak, maple, birch, and hickory are the gold standard. They burn hot, create a deep coal bed, and impart a mild smoke flavor that complements rather than overwhelms. Fruitwoods like apple and cherry add a sweeter, more delicate smoke that pairs well with poultry and pork.
Avoid wood that has been treated, painted, or glued. Pressure-treated lumber releases toxic fumes when burned, and pallet wood often contains chemicals you do not want near food (the EPA). Seasoned wood, meaning wood that has dried for at least six months, burns cleaner and produces better coals than green wood, which hisses and smokes excessively (fs.usda.gov).
For fire building, follow a simple layering method. Start with tinder such as dry bark or newspaper, add kindling in a teepee or log-cabin arrangement, then add progressively larger hardwood splits once the kindling catches. Let the fire burn down to coals before you place any food over it. Patience here pays off in flavor and consistency.
How to Cook Steak Over an Open Fire: Step-by-Step
Cooking steak over an open fire delivers a crust you cannot replicate indoors, but only if you respect the heat. Here is the sequence that works every time.
- Pull your steak from the cooler 30 to 45 minutes before cooking so it warms toward room temperature.
- Build a hardwood fire and let it burn down to a deep bed of coals, roughly 30 to 40 minutes from ignition.
- Pat the steak dry with paper towels and season generously with coarse salt and cracked pepper.
- Rake your coals into a two-zone setup: a thick pile for searing and a thinner layer for finishing.
- Place the steak directly over the hottest coals. Sear for 60 to 90 seconds per side without moving it, building a dark crust.
- Move the steak to the indirect heat zone and continue cooking until it reaches your target internal temperature. Use an instant-read thermometer rather than guessing.
- Rest the steak for 5 to 10 minutes before slicing. Carry-over cooking will raise the internal temperature several degrees during this rest.
The common failure point is skipping the coal bed and cooking over open flames, which chars the exterior while leaving the center cold. Another frequent mistake is flipping the steak constantly, which prevents crust formation. Let each side sit undisturbed, then flip once.
For thick cuts like a 5 cm ribeye, finish in a cast iron skillet or dutch oven set over the coals. This adds gentle ambient heat that cooks the center without burning the crust.
Advanced Heat Zone Management for Open Fire Cooking
Once you master basic zones, you can push further with techniques that give you restaurant-level control. Advanced heat zone management is about understanding how thermal mass, airflow, and coal depth interact to create precise cooking environments.
Thermal mass is your greatest ally. A heavy cast iron dutch oven placed directly on coals absorbs intense heat and redistributes it evenly across the pot's walls. This allows you to braise tough cuts of meat at a gentle simmer for hours, something a thin steel pot cannot do without scorching. The 10" cauldron from Browns Outpost, at $45.99, uses this principle with a reversible lid that becomes a griddle, so one vessel handles both a slow chili and seared toppings.

Stacking coals on the lid of a dutch oven creates an oven environment. Place a bed of coals underneath the pot and a layer on top of the lid. This surrounds the food with even heat from all sides, producing baked bread, casseroles, and roasted meats with consistent results. Manage the ratio: more coals on top for baking, more underneath for stewing.
Ash management matters more than most cooks realize. A thick layer of ash insulates coals and reduces their heat output. Rake ash away from active coals before you add food. Keep a small metal scoop or trowel near the fire for this purpose.
Airflow control is the final lever. More oxygen makes coals burn hotter and faster. Position your grill to catch prevailing wind for a hot sear, or shield it with a windbreak for low-temperature cooking. On windy days, a simple sheet of aluminum foil or a camp table placed upwind stabilizes your heat zones considerably.
Troubleshooting Common Open Fire Cooking Failures
Every camp cook hits the same wall of failures at some point, and most are fixable in the moment if you know what to look for. The most common problem is food burning on the outside before the inside cooks through. This almost always means your heat is too intense. Move the food to a cooler zone or raise the grate rather than flipping it more often.
Flare-ups happen when fat drips onto coals and ignites. A few small flare-ups add char and flavor, but sustained flames will coat your food in soot. Control them by moving the food aside, spreading the coals, or keeping a spray bottle of water nearby to knock down the coals, not the flames. Never pour water directly on a grease fire in a pan, which spreads burning oil (nfpa.org).
Undercooked centers with a perfect crust indicate you skipped the rest step or the cut is too thick for direct heat alone. Finish thick cuts in the indirect zone or in a covered dutch oven. Use the hand test to verify your zones are actually at the temperatures you expect.
Food sticking to the grate usually means the grate is not hot enough or lacks seasoning. Preheat the grate over the coals before placing food, and keep a well-seasoned surface. A properly seasoned cast iron grate releases food cleanly, while a bare steel grate grabs everything.
Ash blowing onto food is a nuisance in windy conditions. Position your cooking surface upwind of the coal bed, or use a windbreak. If ash lands on food, brush it off rather than rinsing it, which washes away flavor and can cause rust on hot cast iron.
Post-Cooking Fire Safety and Cleanup
Professional open fire cooking ends with a deliberate shutdown, not a kicked-over log. Fire safety is non-negotiable, especially in dry conditions where an unattended coal bed can ignite surrounding vegetation. Check that your fire pit or campsite ring is clear of overhanging branches and dry grass before you ever strike a match.
When cooking is done, stop adding fuel and let the fire burn down naturally. Spread the remaining coals and embers in a thin layer across the pit, then douse thoroughly with water. Stir the ashes and douse again until no hissing or steam remains. The coals should be cool enough to touch before you leave the site.
Never bury hot coals. Burying them insulates the heat and can smolder for hours, reigniting after you leave. Carry coals out with you if the fire pit lacks a designated disposal area, and pack them in a metal container until fully cold.
Cleaning cast iron after a fire is simple but specific. Wipe out food residue with hot water and a stiff brush while the pan is still warm. Avoid soap, which strips seasoning. Dry the piece completely over low heat, then rub a thin layer of cooking oil over the entire surface, inside and out. This maintains the seasoning and prevents rust, even in damp camp conditions.
Let the gear cool before packing. Cast iron retains heat for a long time, and packing a hot dutch oven into a canvas bag is a burn risk and a fire hazard. Allow 30 to 60 minutes of cooling time, then wipe and oil before storage.
Mastering professional open fire cooking comes down to controlling heat zones, choosing the right hardwood, and using gear with enough thermal mass to respond to your adjustments. Browns Outpost builds that gear to last, with hand-crafted raw carbon steel construction, a lifetime warranty, and free shipping across Canada on orders over $75 CAD. The ANVIL adjustable campfire grill at $174.99 gives you precise height control over any fire, while our cast iron dutch ovens and cauldrons handle the slow, even cooking that turns good ingredients into camp meals worth writing home about. Get started with Browns Outpost and cook over the fire with confidence this season.
Frequently Asked Questions
What is the best way to cook steak over an open fire?
Start with a hot coal bed, not leaping flames. Pat the steak dry and season it generously. Sear it directly over the hottest coals for 2-3 minutes per side to build a crust, then move it to a cooler zone to finish. Use an instant-read thermometer to hit your target internal temperature, and let the steak rest for 5 minutes before slicing.
How do you manage heat zones when cooking over an open fire?
Rake your coals into a gradient: a deep pile on one side for searing, a thinner layer in the middle, and a bare area on the other side for indirect heat. This lets you move food between zones to control cooking speed. An adjustable grill like the ANVIL lets you fine-tune heat by raising or lowering the grate.
What is the best type of wood for professional-grade campfire cooking?
Hardwoods like oak, maple, hickory, and birch burn hot and produce clean coals ideal for cooking. Avoid softwoods like pine or spruce, which create excess smoke and resin that can ruin food. Always use seasoned, dry wood for the most consistent heat.
How do you prevent food from burning over an open flame?
The key is cooking over coals and embers, not open flames. Wait until the fire has burned down to glowing coals before you start. Use a long-handled spatula and tongs to manage food, and rely on your heat zones to move items away from intense heat when needed.