 listicle
Essential Gear for Open Fire Cooking 2026
Table of Contents
- The 2026 Open Fire Cooking Gear List: What You Actually Need
- Core Cookware and Why Cast Iron Still Wins
- Tools, Fuel, and Fire-Starting Essentials
- Campfire Cooking Equipment: The Complete Kit by Trip Type
- Cast Iron Cookware for Campfire Cooking: Skillets, Dutch Ovens, and More
- Campfire Grill Grate: Adjustable vs Fixed Options
- Campfire Cooking Safety: Fire Management and Handling Hot Gear
- Material and Heat-Performance Comparison
- Maintenance and Care After Cooking Over Fire
- Frequently Asked Questions
Last Updated: October 9, 2026
The 2026 Open Fire Cooking Gear List: What You Actually Need
Open fire cooking rewards good gear and punishes everything else. At Browns Outpost, we build cast iron and carbon steel for the fire.
Open fire cooking is the practice of preparing meals directly over a wood fire, using hot coals, an adjustable grate, or a bed of embers as the heat source. Your gear determines whether that heat works for you or against you.
The one rule that matters most: buy cookware that holds heat and hardware that adjusts. Everything else is optional.
Core Cookware and Why Cast Iron Still Wins
Cast iron remains the best material for open fire cooking: it holds heat, spreads it evenly, and survives direct flame and coal contact that ruins thin steel and non-stick pans.

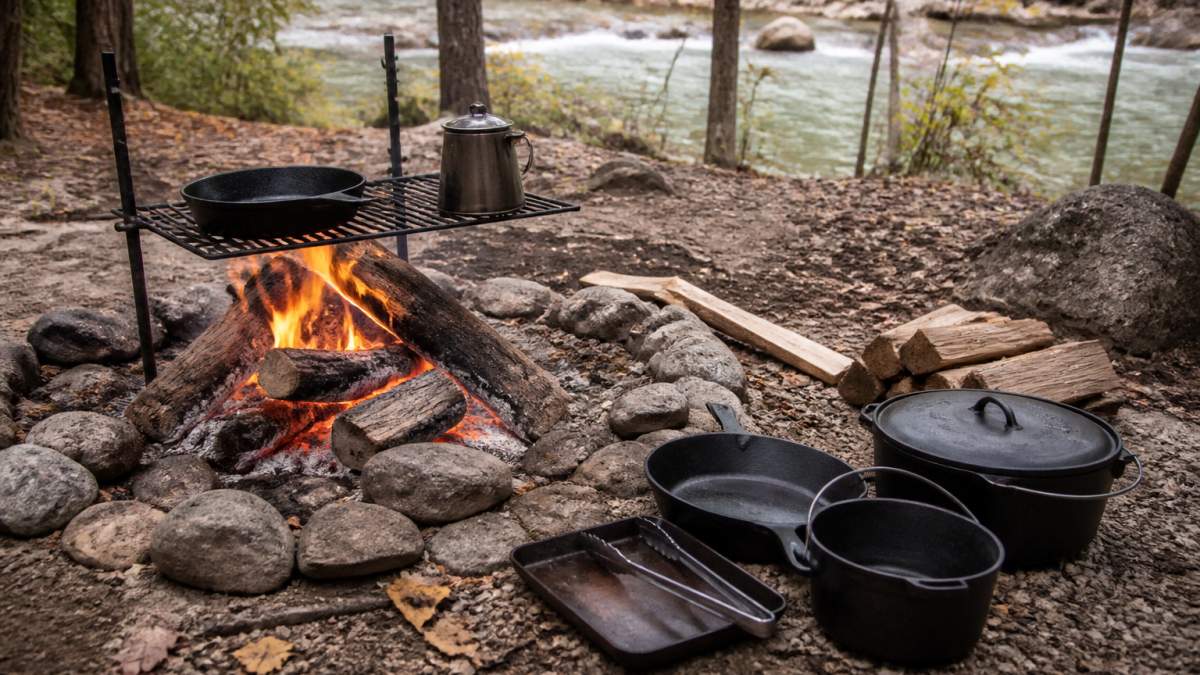
Three pieces anchor a working kit:
- A shallow skillet for eggs, bacon, and searing. The 10" Shallow Skillet from Browns Outpost is built for maximum contact with the heat.
- A Dutch oven for stews, braises, and bread. The 12" Dutch Oven serves 4-6 and bakes under coals on its flanged lid.
- A grill grate for anything you want over open flame rather than in a pan.
The most common mistake is buying thin, lightweight cookware to save pack weight. It scorches, warps, and gets replaced within a season. Cast iron is heavy because the weight is the function.

Tools, Fuel, and Fire-Starting Essentials
Fire-starting tools and handling basics matter as much as the pans. Build this layer around four jobs: start the fire, move the heat, handle hot cookware, and prep food.
- Fire-starting: a ferro rod or waterproof matches, plus dry tinder kept in a sealed bag. Wet tinder is the most common reason a campfire fails.
- Fuel: dead and downed wood, split small. Softwoods light fast; hardwoods burn longer and give better coals for cooking.
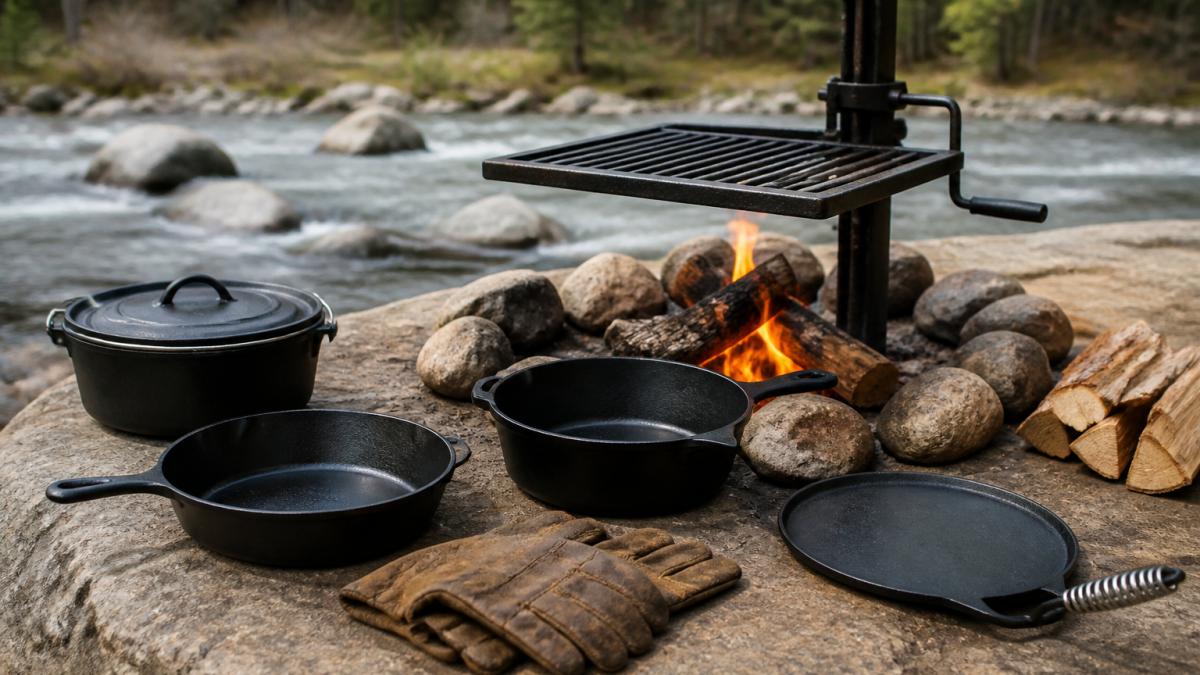
- Handling: heavy leather gloves and long-handled tongs. Cast iron gets hot and stays hot.
A fire pit or established ring keeps the fire contained and gives you a stable base for a grate. Parks Canada publishes current fire regulations and restrictions for the places it manages: Parks Canada fire regulations and restrictions.
Campfire Cooking Equipment: The Complete Kit by Trip Type
Match the kit to the trip, not the store shelf. A backcountry weekend, a car-camping base, and a family reunion need different gear, and buying for the biggest trip means carrying weight you never use. The practical answer is three kits, sized by people, pack weight, and how far you carry it.
Solo and Two-Person Backcountry Setup
Keep it to two cooking pieces and one grate. The 8" Dutch Oven with Lid serves 1-2 and packs smaller than the 12-inch. Pair it with the 10" Shallow Skillet for fast breakfasts, and carry a packable grate that stakes into the ground.
- 8" Dutch Oven with Lid: braises, stews, and small-scale bread
- 10" Shallow Skillet: eggs, bacon, searing
- The Lifetime Warranty ANVIL Grill: adjustable, packs down flat, stakes into ground
Weight discipline matters most here. A full cast iron kit can run over 30 lb (13.6 kg), which is why backcountry cooks carry one Dutch oven and one skillet and leave the rest at home.

Family and Group Camp Setup
For a group, capacity beats packability. The 12" Dutch Oven feeds 4-6, and the 12" Roasting Pan handles larger cuts and catches drippings for a pan sauce. Add the 10" Cauldron with Reversible Lid for one-pot meals; its lid flips into a griddle.
For four to six people, use two heat sources: one Dutch oven for the main and one skillet or griddle for sides.
Full Base Camp and Extended Stay
When the vehicle does the carrying, capacity and redundancy win. Bring the 12" Dutch Oven, 12" Roasting Pan, 10" Cauldron, and 7.5" Sauce Pan, plus a second adjustable grate. Base camp is also where a coffee setup and larger cutting board earn their space.
| Trip Type | Cookware | Grate | Serves | Typical Pack Weight |
|---|---|---|---|---|
| Solo / two-person | 8" Dutch Oven + 10" Skillet | ANVIL Grill | 1-2 | Moderate; one grate plus two pieces |
| Family / group | 12" Dutch Oven + 12" Roasting Pan + 10" Cauldron | ANVIL Grill | 4-6 | Heavy; vehicle-assisted |
| Full base camp | Add 7.5" Sauce Pan for sides and sauces | Two ANVIL Grills | 6+ | Heaviest; not for backpacking |
What to Skip
Every kit has gear that looks useful and never gets used. Skip thin-walled nesting sets, the oversized griddle you cannot level, and a second Dutch oven in the same size. One piece per job is the rule.
Cast Iron Cookware for Campfire Cooking: Skillets, Dutch Ovens, and More
Every piece in a cast iron kit has a job, and the fastest way to waste money is buying two pieces that do the same one.
- 10" Shallow Skillet ($32.99): breakfast, searing, and anything fast. Shallow walls mean maximum heat contact.
- 12" Roasting Pan ($48.99): roasts, larger cuts, and pan sauces. Deep walls catch drippings instead of losing them to the fire.
- 12" Dutch Oven ($52.99): stews, braises, and camp-oven baking for 4-6.
Which Piece for Which Meal
Breakfast is the skillet. Dinner for a crowd is the 12-inch Dutch oven or cauldron. A roast is the roasting pan; sides and sauces are the sauce pan. Start with the skillet and a Dutch oven, then add the rest as your cooking grows.
Campfire Grill Grate: Adjustable vs Fixed Options
An adjustable grate beats a fixed one for open fire cooking because heat control is the whole game.
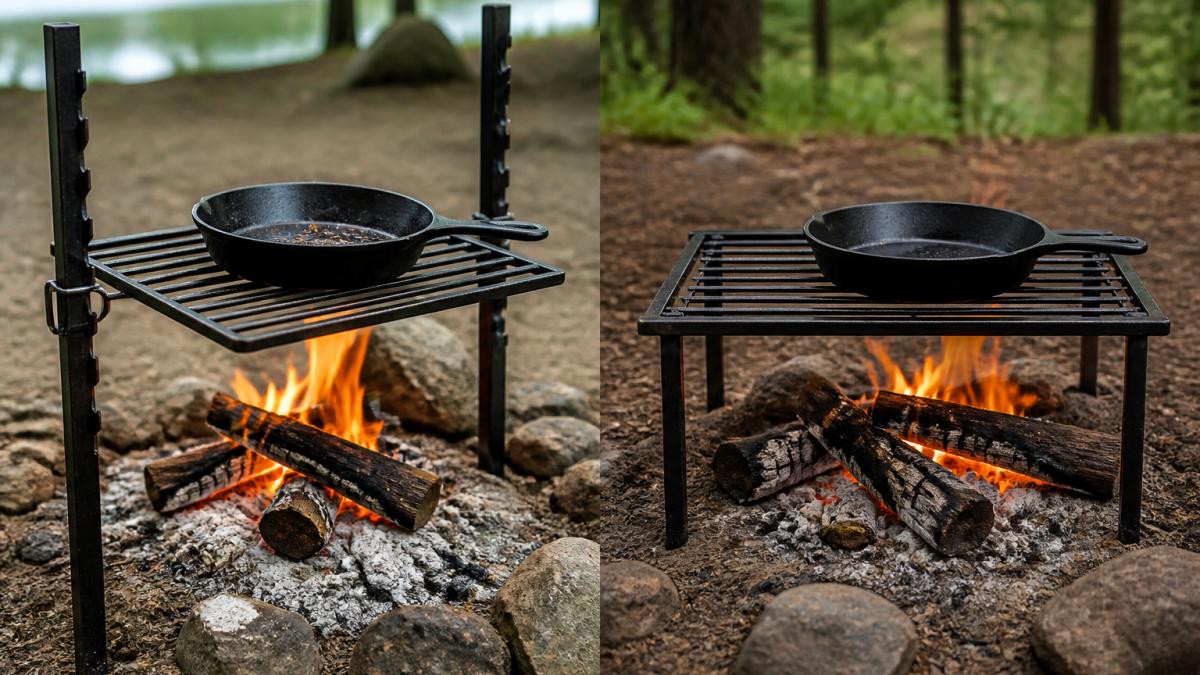
Adjustability is not a convenience feature. It is the difference between searing a steak and steaming it. When the fire flares, you raise the grate instead of waiting it out.
The Lifetime Warranty ANVIL Grill →
The drawback is weight: at 16.5 lbs, the ANVIL is not a backpacking item. For backcountry trips, a lighter packable grate makes more sense.
Campfire Cooking Safety: Fire Management and Handling Hot Gear
Fire management separates a good camp cook from a burned dinner, and it starts before you light anything. Build the fire small and let it burn down to coals before you cook.
Keep these habits:
- Cook over coals, not flames. Rake coals to one side for a hot zone and a cool zone.
- Never leave the fire unattended. Have water or dirt within reach before you start.
- Use gloves for every piece of cast iron. A hot handle looks identical to a cold one.
Where you camp determines which rules apply, set by the land manager for that area. Confirm current restrictions before your trip rather than assuming last season's rules hold.
Material and Heat-Performance Comparison
Material choice decides how a piece behaves over a fire, and the differences are mechanical, not cosmetic. Heat retention, conductivity, weight, and how the surface reacts to direct flame all change what you can cook.
| Material | Heat Retention | Conductivity | Weight | Best For | Open Fire |
|---|---|---|---|---|---|
| Cast iron | High | Low (heats slowly, holds long) | Heavy | Slow cooking, searing, baking | Excellent |
| Carbon steel | High | Moderate (responds faster than cast iron) | Moderate | Grates, griddles, searing | Excellent |
| Stainless steel | Moderate | Low | Moderate | Boiling, sauces, acidic foods | Fair; can warp and discolor |
| Aluminum | Low | High (heats and cools fast) | Light | Boiling water only | Poor |
| Copper | Low | Very high | Moderate | Precise stovetop work, not fire | Poor |
| Enameled cast iron | High | Low | Heavy | Braises and acidic dishes | Fair; enamel can chip over coals |
| Non-stick coated | Low | Moderate | Light | Not recommended | Damages coating |
The practical takeaway: for anything touching direct flame or coals, choose cast iron or carbon steel. Aluminum heats and cools fast, so it is fine for boiling water and poor for searing.
How Each Material Behaves Over Flame
The mechanism matters more than the label. Cast iron's low conductivity is why it takes minutes to heat evenly but then holds temperature when you add cold food. Carbon steel heats faster, holds heat nearly as well, and is lighter, which is why it is the standard for grates and griddles. Stainless steel's low conductivity creates hot spots over coals, so it works best for liquids.
Seasoning and Surface Care by Material
Cast iron and carbon steel both rely on a seasoning layer of polymerized oil for non-stick surface and rust resistance. Carbon steel seasons faster and is lighter; cast iron holds heat longer and tolerates more abuse. Stainless steel needs no seasoning but can warp if heated unevenly. Enameled cast iron must avoid thermal shock, so do not move it from a hot fire to cold water.
Weight and Packability Trade-Off
Heat performance and pack weight pull in opposite directions. Cast iron gives the most stable cooking temperature but is heaviest. Carbon steel gives most of that stability at lower weight, which is why it dominates grates. Stainless and aluminum are lighter but give up heat retention. For backpacking, the trade-off usually lands on one carbon steel or cast iron piece plus a packable grate; for car camping, cast iron's stability wins.
Maintenance and Care After Cooking Over Fire
Cast iron lasts for generations if you clean it, oil it, and keep it dry. The seasoning layer is what makes it non-stick and rust-resistant.
- Clean while warm: burn off residue over the fire, then brush clean. Hand-wash with hot water only, no soap needed.
- Dry immediately on heat: put the piece back over warmth so no water sits on the surface.
- Re-oil after every use: a thin coat of neutral oil keeps the seasoning glossy.
For the ANVIL Grill, the routine is the same: burn off residue, brush while warm, oil the grate lightly, and store it dry.
Every Browns Outpost piece carries a lifetime warranty against manufacturing defects, so the gear you buy once is meant to be the gear you keep. Customers like Dan D. put it plainly: "This grill has completely changed over-the-fire cooking for me. I have never had a grill this strong and durable."
Frequently Asked Questions
What gear do you need for open fire cooking?
A complete open fire cooking kit includes a cooking surface such as an adjustable grill grate, at least one cast iron skillet or Dutch oven, a fire-starting tool, heat-resistant gloves, long-handled utensils, and a foldable cutting board for food preparation. For group trips, add a larger Dutch oven or cauldron. The ANVIL Grill at $174.99 covers the grate and adjustable height in one piece, and pairs with any cast iron pot or pan from the same range.
Can you use cast iron over a campfire?
Yes. Cast iron handles direct flame and coal contact better than almost any other cookware material. It holds heat evenly, does not warp under high temperatures, and works on campfire coals, a grill grate, a stovetop, or in a home oven. Browns Outpost cast iron pieces, including the 12-inch Dutch Oven at $52.99 and the 10-inch Shallow Skillet at $32.99, are built specifically for open fire use and carry a lifetime warranty.
Do you need a grill grate for open fire cooking?
A grill grate gives you a stable, level cooking surface above the coals, which makes it easier to control heat and flip food without losing pieces to the fire. An adjustable grate lets you raise or lower the cooking surface to dial in exact heat, which is useful for both searing and slow cooking. The ANVIL Grill provides 38 x 50 cm of carbon steel surface, handles up to 20 kg, and stakes directly into the ground over any fire pit or campsite ring.
How do you clean cast iron after cooking over a fire?
Let the cookware cool slightly, then hand-wash with hot water only. No soap is needed. Dry it immediately on heat so no water spot gets a chance to rust the surface. Apply a thin coat of neutral oil after each wash to keep the seasoning glossy and non-stick. Never put cast iron in a dishwasher, as one cycle strips the seasoning. Burn off heavy residue over the fire and brush the surface clean while it is still warm.
How do you safely set up a campfire cooking area?
Clear a 3-metre radius around the fire pit of dry grass, leaves, and overhanging branches. Use an existing fire ring where one is available, or build a containment ring from rocks. Keep a water container and shovel within reach. Never leave the fire unattended, and make sure coals are fully extinguished before you sleep or leave the site. Position your cooking grate so you can adjust height without reaching directly over the flames.
Building an open fire cooking kit is a decision about longevity. Buy thin gear and you replace it every season; buy cast iron and carbon steel and you cook on it for decades. Browns Outpost makes heavy-duty cast iron cookware and the adjustable ANVIL Grill, all backed by a lifetime warranty, free shipping over $75 CAD, and a design built for pro results over any fire. Get started with Browns Outpost and build your kit once.